As I explained in my post Advice on Buying a Telescope Online, there are two types of telescopes. Both have a different set of needs when it comes to maintenance.
The maintenance is an important part if you do want your telescope to continue to perform well and who wouldn’t want such?! In most cases you’ll just have a small dust problem, but dust on your mirror is not easy to clean (well… it’s not that hard, but it’s a bit of work) so if there was a way to make it easy on you, wouldn’t that be great?
For a Refractor Telescope, a simple cloth will be enough to clear the lens. The inside of the telescope is protected since there are lenses on both ends and thus no dust will go inside the telescope.
Contrary to a Refractor, Reflector Telescopes are open. In other words, dust enters the telescope and ends up on your mirror and various other parts of the telescope. For those, I strongly advice that you find a compatible case. The case will take the dust and protect what’s inside: your telescope. A Reflector telescope protected by a case can last years with very minimal maintenance. Of course, this depends on how often and how long you’re using it on each of your astronomy outing.
If you considered getting the Orion Starblast 6 as I mentioned in Advice on Buying a Telescope Online, and you are ready to get a case, then you can get the compatible case, the Orion 15100 Soft Case for StarBlast 6 and 6i Reflector Telescopes (click link to find case on Amazon.com.)
Cool trick: before you open your case, make sure to dust it with a wet piece of cloth. If you are going on a trip, it will probably be easier to do that at home before leaving.
What Happens If I Skip Maintenance
The cleaning of your telescope optics is important because each speck of dust is a place where the light from the sky bounces, creating a bright spot, or gets absorbed, creating a dark spot. With time and no maintenance, you will be missing some rays of light or have a diffraction effect, which we see as a bright spot, in your images.
Just a few specks won’t make much of a difference, but once too much dust collected on your optics (glass and lenses) the image you see won’t be optimal. The result is generally a blurry effect.
What is the Most Important Cleaning Advice You Could Give Me?
If there is one thing I can tell you about the cleaning process is that you are dealing with delicate parts. If you scratch a lens or a mirror, then your telescope won’t work well anymore. This is similar to having scratches on your glasses (if you wear such, you probably noticed!) In most cases, a small scratch will be transparent to your vision, but a large scratch is going to bother you. In case of a telescope, it will distort the image (maybe you’ll see the sky as Galileo Galilei saw it… his lenses were of rather poor quality compared to today’s!)
Therefore, when you want to clean your telescope optics, you want to use the right tools. That’s the correct screw drivers to open your telescope, the proper type of cloth, or an air duster can to blow dry air with a strong pressure. Anything that will ensure that you do not scratch your optics while cleaning it.
Again: you want to keep your equipment in the best possible shape and that means doing a slow but safe cleaning job. If you’re a bit too excited when you get started, just enhance your calm first.
Second Most Important Advice
The optics of your telescope is coated with a film that is sensitive (as in, will be attacked by) to the oil you secrete. For this reason, you do not want to touch any of these parts directly.
This is not always easy and accidents happen. If you end up with a finger print on one of your lens or mirror, make sure to clean it as quickly as possible. Don’t rush so bad as to take the risk to make it fall or scratch the element. But don’t wait hours or damage will start happening.
The Next Important Advice
When you blow on something, you pretty much always include spit. For sure, you include moisture. In general, you are not going notice it with a naked eye. But on optics like you have in your telescope, it is not a good thing. Your spit includes all sorts of chemicals that will deteriorate your telescope optic parts.
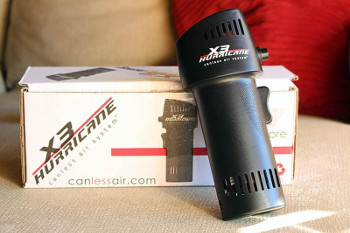
If you are not afraid of eating dust, you can aspirate instead. When sucking, you do not take the risk of spitting on the part. For the sucking to work, place your fingers over the eyepiece to create as small a space as possible. Personally, I do not do that because it’s just too tricky and prone to you touching the lens anyway. You better use an air duster can or the X3 Hurricane power tool.
Cleaning a Refractor Telescope
In most cases a Refractor Telescope will have a lens on both ends and thus half of the optics will be enclosed in a dust free environment. The cleaning is limited to the outside of the telescope optics.
If you still have your telescope notice, there should be a few paragraphs to a few pages about cleaning it. I strongly advice you to look into that first to make sure you follow the manufacturer’s specifications instead of what I suggest here (it should be very similar, though).
Using a simple soft cloth should be enough to clean the lenses. A cloth made of cotton should be enough for that task.
If there is something on the lens such as a bird dropping, you can use a wet cloth. Just don’t make it so wet that it drips all around the telescope. It should be wet enough to remove the dirt without scratching the lens, no more.
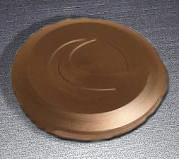
 Also, Reflector Telescopes usually come with lens covers as shown on the picture. Most covers are black. Just don’t lose yours and you’ll save yourself some maintenance work. Also, while transporting your telescope, it is a good idea to have the lens cover on. Walk to close to bushes once and you could end up with a big scratch on your lens.
If you lose your lens cap, search on Google, I’m sure you can find a replacement. It costs under $20 which is more than worth it to protect your expensive telescope optics. Of course, you could as well use a plastic bag or some other protective object. Just remember to avoid touching the lens so as to not scratch it. Both lenses, the objective of the telescope and the eye piece should be protected by a cap whenever you are not using your telescope. Just like having a case, this will save you some maintenance time.
Cleaning a Reflector Telescope
There are three main types of Reflector Telescopes. Each have a different degree of maintenance requirements so that is another aspect on which telescope to choose when you are ready to purchase new equipment.
Closed Reflector Telescopes
Today, quite a few Reflectors have a piece of glass at the top so the optics, the two mirrors and the eye piece lens on the inside, are protected from dust. Just cleaning that glass as you would clean your windows at home should be enough. The eye piece may also need a little cleaning. Just make sure you do not use a scratching cloth. You can use water on that glass, although make sure it doesn’t drip anywhere. Use just enough to do the cleaning. Cleaning products (instead of water) should be used with care. If you still have the telescope notice, verify that you can indeed use cleaning products safely. My experience is that such products tend to leave streaks behind. Not a good thing.
Opened Reflector Telescopes
Now, Reflectors that do not have a protective glass will collect dust inside their tube. That dust will deposit on the spherical mirror and possibly on the flat mirror (the one redirecting the light to the eye piece) and the inside of the eye piece. All those parts may require some amount of cleaning once in a while.
Framed Reflector Telescopes
Another type of Reflector is the one with a frame instead of a solid tube. Those are used with larger telescopes to reduce their weight. It makes them look really cool too, I think. However, there is no good trick to protect them from dust except by having a compatible case.
Cleaning the Mirror of a Reflector Telescope
In most cases, a Reflector mirror is not accessible as is for cleaning. What you need to do is remove it from the tube, clean it, and then mount it back on.
Hopefully you still have the instructions from the manufacturer. If you can’t find them in your storage area, the telescope box (you kept it’s box, right? I like to do that when it’s possible to store it back in the box,) or anywhere you could have kept that manual, then you may want to search the manufacturer website for those instructions.
Depending on your Telescope, you may have manual screws that you can turn without the need for a screwdriver, a wrench, or an Allen-key. If a wrench is needed, I strongly advise that you use the exact size and not an adjustable spanner. This is because you are less likely to slip with a wrench. Slipping in the wrong direction could be fatal to your optics.

Once dismounted, it is preferable to clean your mirror using compressed air from an air duster can. or maybe you’d like to use the X3 Hurricane (Yeah! I know! But I like toys like those… He! He!)
It is also possible to use a piece of cloth and even put the mirror under a water flow. In any even, make double sure to not scratch the mirror. That’s the end of it once it is scratch and as far as the cost of the telescope goes, that’s pretty much the most expensive part… so replacing a scratched mirror is generally 50% or more of the cost of a brand new telescope.
If you used water, make sure to let the mirror dry before mounting it back. Moisture in the telescope could allow mold to grow in there. Not a good thing.
How Much Dust is Too Much Dust?

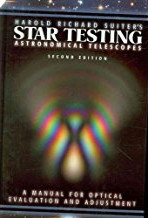
According to Harold Richard Suiter, who wrote a book named Star Testing Astronomical Telescopes: A Manual for Optical Evaluation and Adjustment by Harold Richard Suiter (click to check for available copies on Amazon.com) you can have quite a bit of dirt on your mirror and other parts before you really notice a difference. In other words, cleaning should be a relatively rare event, especially if you protect your equipment while being stored. (i.e. the garage may not be the best place if you have spiders there.)
According to Suiter, the maximum amount of dust even for a perfectionist, can cover as much as 1/1000th of your mirror.
So say you get the Orion Starblast 6 telescope, which has a mirror with an aperture of 152.4mm. This is a surface of about 145,931 mm2 (assuming a flat mirror) and 1/1000th of that surface is 146mm2. This is a small square of roughly 12 mm x 12 mm. (12 mm is 1.2 cm or about half an inch.) I’m pretty sure this is assuming the dust is dispersed and not in one big concentrated square (i.e. such a square will clearly be giving you trouble.) Still, it’s quite a bit of dust before you start noticing problems.
The book actually explains a method to verify whether your telescope requires a cleaning or not. The test makes use of optic mathematics as used by physicists, so you can be sure that it actually works with high precision. (Oh! Yeah… pointing a light at your mirror won’t really tell you whether it is dusty. It very much depends on the type of mirror you have, but many do not reflect light like the mirror in your bathroom! A better inspection method is what Suiter tells you to do in his book.)
Trick to Avoid Dust While Your Reflector Telescope is Stored
One cool trick to avoid dust is to store the Reflector up side down, with the whole on the ground. In effect this closes the telescope and dust is not known to go up in an environment without strong enough air circulation.
Obviously this trick only works well for telescopes with a solid tube. For those with a Frame, you really want to get a compatible case.
If you have the room, and the box first the mounted telescope, you can also keep the box the telescope came in. It won’t be weather proof or 100% dust proof like a case, nor have nice handles to carry the telescope around, but it will still offer excellent protection.
What Makes a Telescope Case a Good Case?
If the manufacturer of your telescope does not offer a case that’s one to one compatible with your telescope (such as the case for the Orion Starblast 6 and 6i, click and check it on Amazon.com), you want to make sure that the case is large enough.
There are generally three parameters to take in account:
- The case must be large enough (right length, circumference, and especially an area for the eye piece so you do not have to dismount the eyepiece each time you transport your telescope.)
- The case must be easy to open, remember that when you go on a trip you are likely to be in the dark when you handle your telescope; you should learn ahead of time how to handle it in very low light!
- The case must be of good quality as to (a) close in a way that prevents dust from going in and (b) the inside (and probably outside too) does not itself generate dust—otherwise what would be the point, right?
There are other points of importance, but those three are really important.
Something you may want to look into is a case that makes it easy to carry the telescope. Maybe it has a strong strap. A perfect case will have the strap at the exact right location so the telescope remains horizontal while you carry it.
Weather proof cases are best if you are to store your telescope in a room that can get wet. The last thing you want is mildew growing in your telescope. It’s difficult to get rid of in such a device.
Specialized cases come with a side pocket to store your various eye pieces and other accessories.
The material used for the case should be strong so as to not tear. The last thing you want is to have your telescope fall out of the bag while you are carrying it to your stargazer watch site.
Excellent cases come with enough padding to offer good protection against bumping your telescope.

Leave a Reply